


Article
Dermatologist Magnifying Glass
There are several kinds of dermatological magnification tools and the following are some of the common ones together with their uses. Handheld magnifiers are the most basic and are for limited use on small areas remain of free skin. and Head are mounted useful magnifiers for are examining worn and on manipulating the the head…
There are several kinds of dermatological magnification tools and the following are some of the common ones together with their uses. Handheld magnifiers are the most basic and are for limited use on small areas remain of free skin. and Head are mounted useful magnifiers for are examining worn and on manipulating the the head skin such in that detail. the Digital hands magnifiers of are the instruments doctor that use electronic means of enhancing the size of an object for observation and the enhanced image is displayed on an electronic screen.
The dermatoscope is a medical instrument used by dermatologists to examine skin lesions and is one of the most popular magnifying observation devices in dermatology. Other types of dermoscope include polarized dermoscope that can take away scattered light from the skin surface, thus enabling doctors to have a clear view of the internal structure of skin lesions.
Technical Characteristics of Different Types of Dermatoscopes
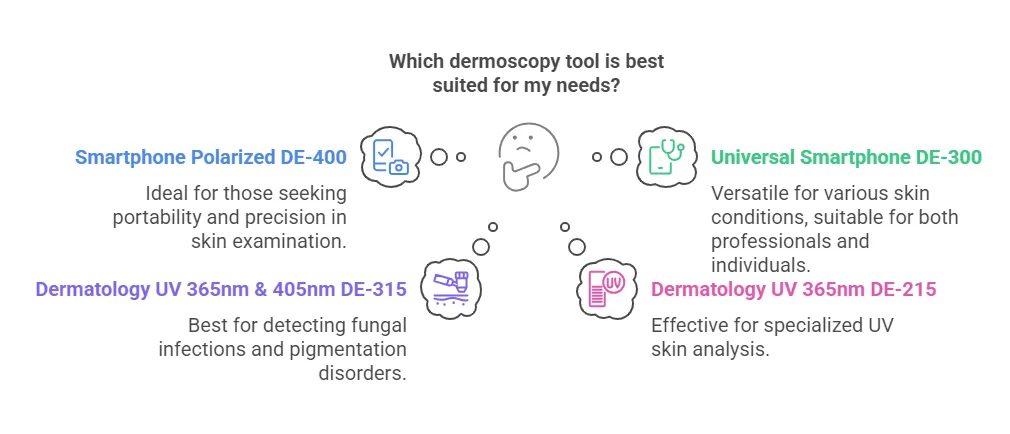
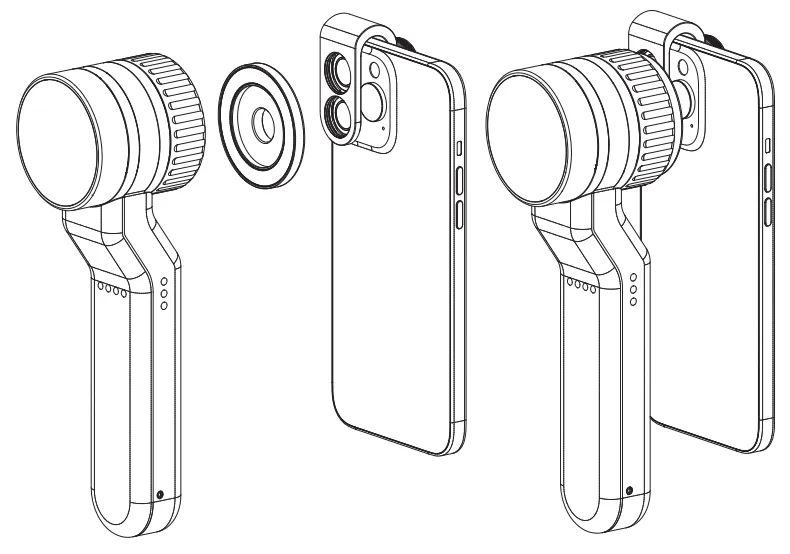
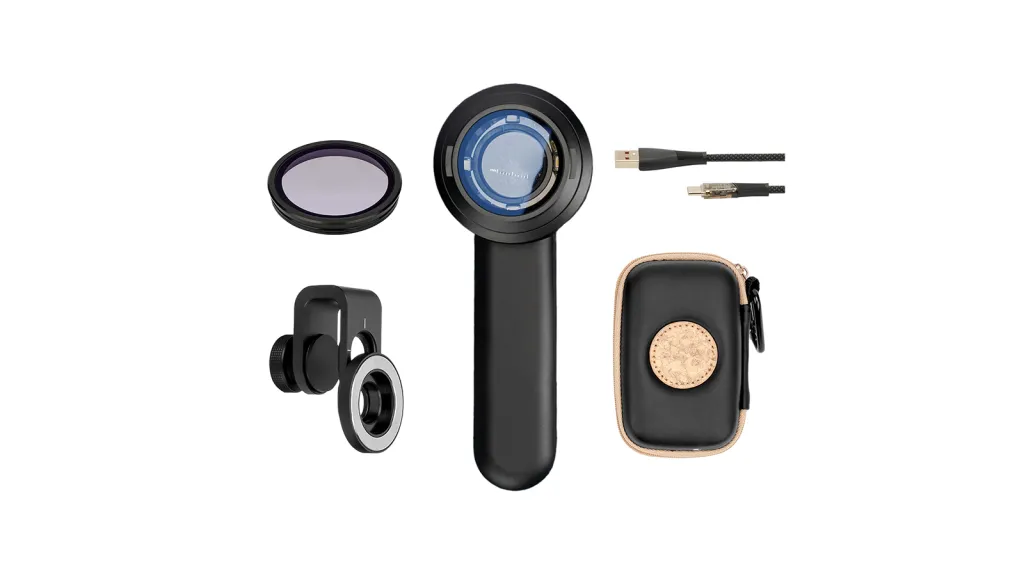
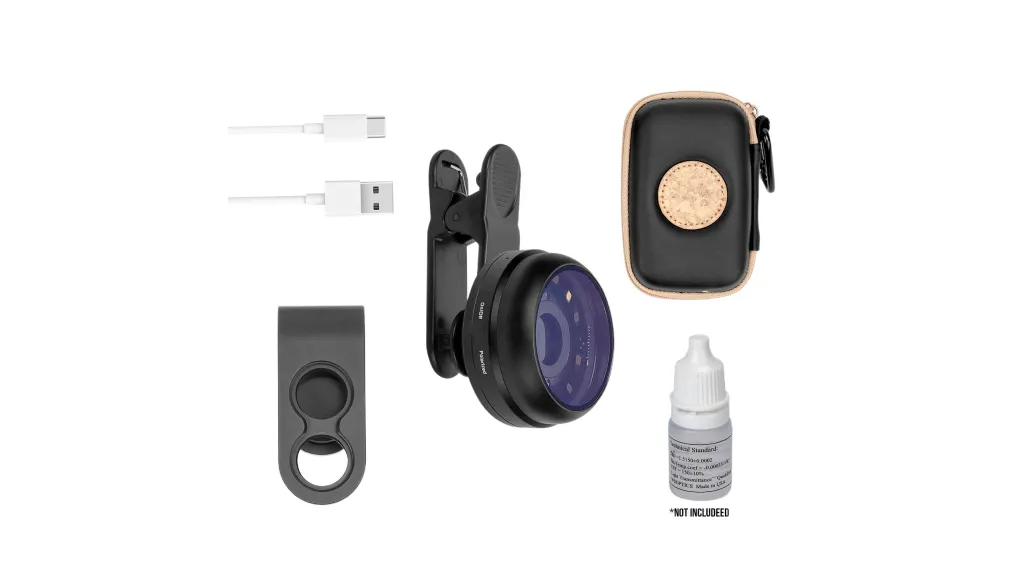
IBOOLO optical dermatoscopes are categorised into handheld dermatoscopes and pocket dermatoscopes. Pocket dermatoscopes can be regarded as simple versions of dermatoscopes. IBOOLO DE-200 and DE-300 have a magnification of 6X and a field of view of 12mm. DE-200 is the first generation of dermatoscopes from IBOOLO, which has only polarised light. DE-300 is an upgraded version, which has both polarised and unpolarised light. DE-400 is the newest version of IBOOLO’s pocket dermatoscopes at present. DE-400 is IBOOLO’s newest pocket dermatoscope with 10X magnification and 20mm window.
The DE-400 is the latest IBOOLO pocket dermatoscope with 10X magnification and a 20mm window, both polarised and non-polarised.
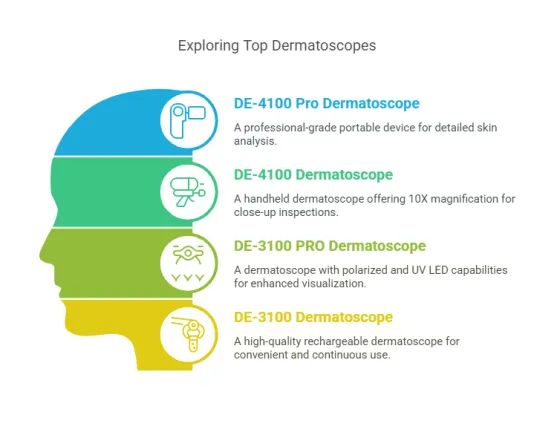
IBOOLO’s handheld dermatoscopes are currently available in two models, the DE-3100 and DE-4100, both of which have the same 10X magnification, with the difference that the window of the DE-3100 is 32mm and that of the DE-4100 is a bit larger at 48mm. the illumination systems of both models are more complete and versatile than those of the Pocket Dermatoscope. They have four lighting modes, white light polarised, amber light, mixed light polarised and white light unpolarised, which are suitable for the observation of a wide range of skin lesions.
The whole series of IBOOLO dermatoscopes basically adopts the all-metal appearance and aluminium alloy manufacture. The metal feature can effectively prevent the dermatoscope from being damaged by dropping or external impact, and improve the durability.
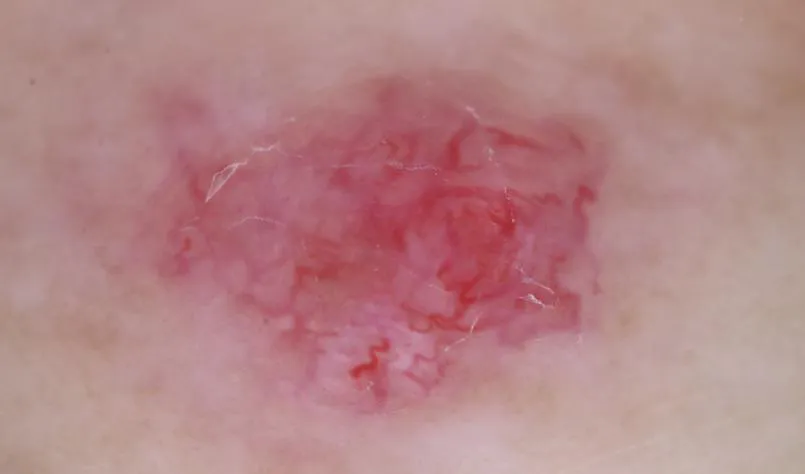
Dermoscopy in Clinical Diagnosis
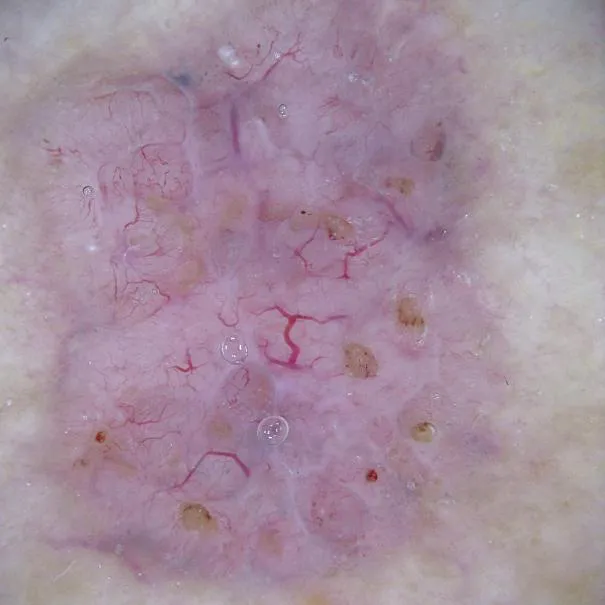
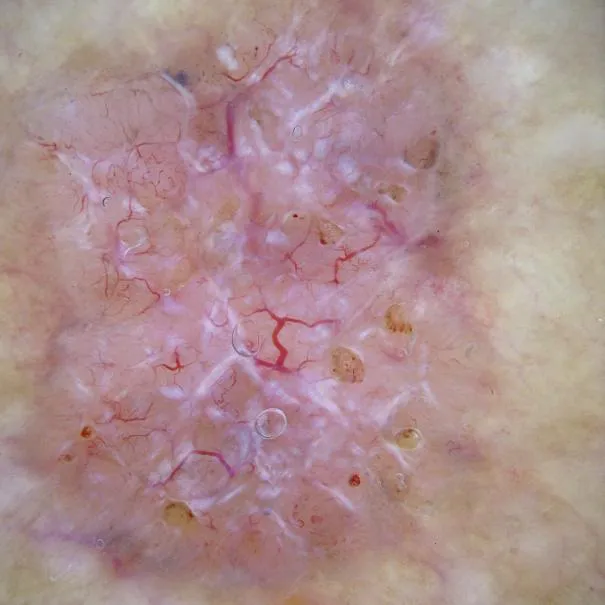
Dermoscopy is most extensively used in the day to day clinical practice for the purpose of skin lesions’ detailed observation. The pigmented lesions of the skin, including moles, freckles and pigmented spots can be seen in dermoscopy that cannot be seen with the naked eye. It is also able to see the tiny structures underneath the skin surface which is vital in the diagnosis of certain lesions. The early detection of skin cancer particularly melanoma cannot be done without dermoscopy in its early stages. Melanoma is generally an irregularly shaped lesion with an irregular color pattern and poorly defined edges. Through dermoscopy with its magnification and high resolution imaging, doctors are able to identify these early signs such as the pigmented glaze and asymmetrical vascular patterns and hence decide whether the lesion is dangerous or not. Dermoscopy is not only used for the examination of skin surface but can also be employed in the diagnosis of hair and scalp disorders. The dermoscopy of the scalp offers a clear view of the density of the hair, the state of the hair follicles and any abnormal skin lesions such as psoriasis and tinea capitis. In addition, dermoscopy is particularly useful in the evaluation of nail diseases as it provides a clear view of the nail plate, color and structures as well as lesions beneath the nail. For instance, dermoscopy can help in the identification of onychomycosis, nail injuries, peronychia, and other vascular abnormalities under the nails.
How to Choose the Right Dermatologist Magnifying Glass
If you want to buy IBOOLO dermatoscope and don’t know how to choose, then you can read this board carefully.
If your budget is not high, then you can first consider our pocket dermatoscope series. Each of the Pocket Skin Mirrors has a polarised light feature that will satisfy your basic use of skin mirrors. However, the Pocket Dermoscopes range can only be connected to a mobile phone for skin examination and have low magnification except for the DE-400.
If you have a relatively high budget, then consider the IBOOLO handheld dermatoscope series. The handheld dermatoscopes have a magnification of 10X, which can help doctors to observe many details that are not visible to the naked eye. It also has a variety of light modes to help the doctor easily observe all types of lesions. However, the price is higher for beginners.
Tips for the Proper Use of Dermatologist Magnifying Glass
When skin magnification is performed, the magnification of the dermatoscope is adjusted according to the size of the examined area and the details required. Observe the window of the dermatoscope until the area under observation is clear. As well as to avoid too close contact between the dermatoscope and the skin, so as not to affect the observation effect or produce errors.
After use, be sure to clean the lens of the dermatoscope to avoid oil, dust, etc. affecting the image quality. Use special lens cleaning paper or a fibre-free cleaning cloth to gently wipe the surface of the lens. At the same time, this operation can avoid cross-infection between patients to the greatest extent possible.
Through non-invasive examination of dermoscopy, a lot of information can be obtained, but the final diagnosis may still be confirmed by pathology and skin biopsy. For suspicious lesions found during dermoscopy, doctors may consider further pathological section examination.
Dermatologist Magnifying Glass in Modern Dermatological Practice
Dermoscopy has become an indispensable tool in modern dermatological clinical diagnostics, especially in the early screening of skin lesions, the diagnosis of skin cancer, and the precise evaluation of skin diseases. Moreover, dermoscopy reduces skin irritation and discomfort while avoiding patient anxiety and pain associated with biopsies.
Dermatologist Magnifying Glass: Key to Skin Diagnosis - IBOOLO
Master skin diagnosis with a dermatologist magnifying glass. This tool enhances visibility for early detection of skin conditions. Learn essential tips for choosing and using it effectively.
Dermatologist Magnifying Glass: The Key to Accurate Skin Diagnosis
Discover how a dermatologist's magnifying glass enhances skin examination with advanced magnification and lighting. Learn about its key features, clinical applications, and tips for integrating it into practice. Master the essentials of using this tool for early detection and accurate diagnosis of skin conditions.
What is a Dermatologist Magnifying Glass: Tools of the Professional Trade
A dermatologist magnifying glass, often referred to as a dermatoscope, is a specialized tool used by skin care professionals to examine the skin in detail. Unlike a standard magnifying glass, this device combines magnification with advanced lighting systems to reveal subtle skin structures and abnormalities that are invisible to the naked eye. It is an essential tool in diagnosing conditions like skin cancer, melasma, psoriasis, and other dermatological disorders.
For dermatologists, this tool enhances diagnostic accuracy by providing a clearer view of pigmentation patterns, vascular structures, and skin texture. It bridges the gap between visual inspection and more invasive diagnostic methods, making it a cornerstone of modern dermatological practice.
What Are the Structure and Components of Professional Dermatological Magnifying Glasses?
Professional dermatological magnifying glasses are designed with precision to ensure optimal performance. Here’s a breakdown of their key components:
1. Magnification Lens: Typically offers 10x to 20x magnification for detailed skin examination.
High-quality lenses minimize distortion and provide clear, sharp images.
2. Lighting System: Built-in LED lights, often with polarized and non-polarized modes, illuminate the skin evenly.
Polarized light reduces glare and reveals subsurface structures, while non-polarized light highlights surface details.
3. Ergonomic Handle: Designed for comfort and stability during prolonged use.
Lightweight materials reduce hand fatigue.
4. Adjustable Focus: Allows clinicians to fine-tune the focus for different skin types and areas.
5. Portable Design: Compact and easy to carry, making it suitable for both clinical and field use.
These components work together to provide a reliable and efficient tool for skin examination.
How to Integrate Magnifying Glass Examination into Dermatology Practice: A Clinical Workflow
Integrating a magnifying glass into your dermatology practice can streamline the diagnostic process. Here’s a step-by-step workflow:
1. Patient History and Initial Assessment: Gather the patient’s medical history and conduct a visual inspection of the affected area.
2. Magnifying Glass Setup: Choose the appropriate magnification and lighting mode based on the area being examined.
3. Detailed Examination: Use the magnifying glass to closely inspect skin lesions, pigmentation, or abnormalities.
Document findings through notes or images for future reference.
4. Diagnosis and Treatment Planning: Analyze the magnified view to confirm or rule out specific conditions.
Develop a treatment plan tailored to the patient’s needs.
5. Follow-Up and Monitoring: Use the magnifying glass during follow-up visits to track treatment progress.
This workflow ensures a thorough and systematic approach to skin examination.
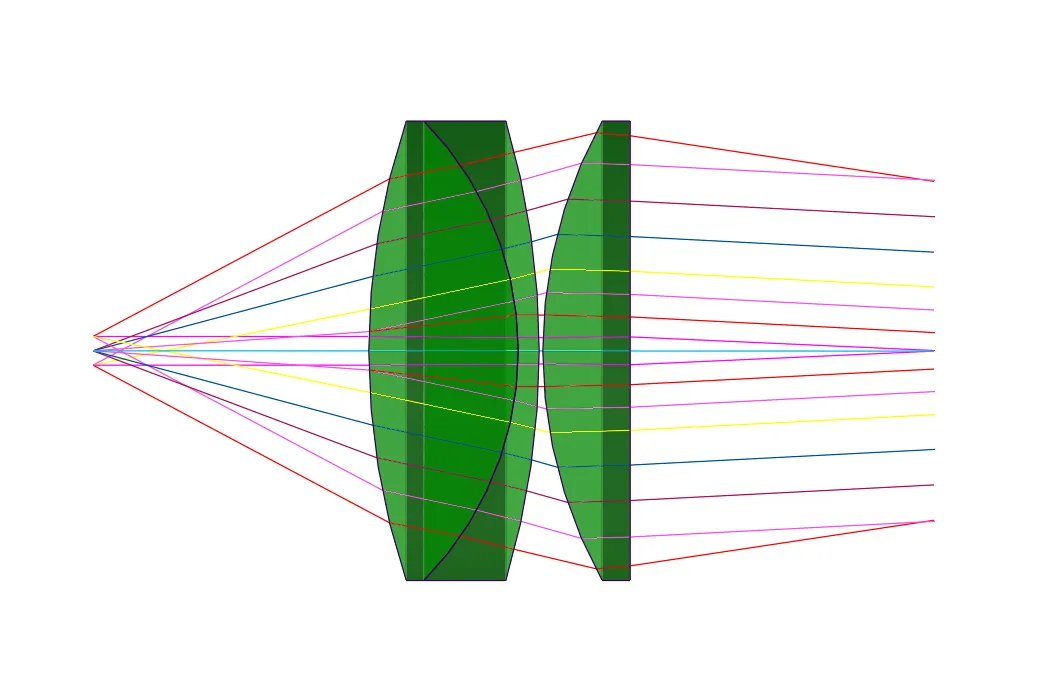
How Do Optical Magnification Principles Work in Dermatological Diagnosis?
Optical magnification in dermatological diagnosis relies on the principles of light refraction and lens design to enlarge and clarify skin structures. Here’s how it works:
1. Light Refraction: The lens bends light to focus it on the retina, creating a magnified image.
High-quality lenses minimize aberrations, ensuring a clear and accurate view.
2. Illumination: Built-in lighting systems enhance visibility by illuminating the skin evenly.
Polarized light reduces surface reflection, revealing deeper structures.
3. Magnification Levels: Lower magnification (10x) provides a broader view, while higher magnification (20x) offers detailed insights into specific areas.
4. Depth of Field: Adjustable focus allows clinicians to examine different layers of the skin, from the epidermis to the dermis.
By leveraging these principles, dermatological magnifying glasses provide a powerful tool for accurate diagnosis.
How to Properly Use a Dermatological Magnifying Glass for Self-Skin Checks
Self-skin checks using a dermatological magnifying glass can help individuals monitor their skin health. Here’s a step-by-step guide:
1. Choose the Right Tool: Select a magnifying glass with at least 10x magnification and built-in lighting.
2. Prepare the Skin: Clean the skin area to remove dirt or oils that could obscure the view.
3. Set Up Lighting: Ensure the area is well-lit, and use the magnifying glass’s built-in light for additional illumination.
4. Examine the Skin: Hold the magnifying glass steady and move it slowly over the skin.
Focus on areas with moles, spots, or unusual textures.
5. Document Findings: Take notes or images of any suspicious areas for further evaluation by a dermatologist.
6. Regular Checks: Perform self-examinations monthly to monitor changes over time.
What Are the Applications of Magnifying Glasses Across Different Dermatological Conditions?
Dermatologist magnifying glasses are versatile tools used to diagnose and monitor a wide range of skin conditions. Here’s how they are applied:
1. Skin Cancer Detection: Helps identify early signs of melanoma, basal cell carcinoma, and squamous cell carcinoma by revealing irregular borders, color variations, and asymmetric structures.
2. Melasma and Hyperpigmentation: Provides detailed views of pigmentation patterns, helping differentiate between epidermal and dermal melasma.
3. Psoriasis and Eczema: Allows for close examination of scaling, redness, and plaque formation, aiding in accurate diagnosis and treatment monitoring.
4. Acne and Rosacea: Enables clinicians to assess inflammation, pustules, and vascular changes in detail.
5. Infectious Skin Conditions: Helps identify fungal infections, warts, and parasitic infestations by revealing characteristic patterns and textures.
By enhancing visibility, magnifying glasses improve diagnostic accuracy and treatment outcomes across various dermatological conditions.
How Does Magnification Accuracy Compare Between Dermatologist Magnifying Glasses and Other Tools?
Dermatologist magnifying glasses offer superior accuracy compared to other tools due to their specialized design. Here’s how they stack up:
1. Standard Magnifying Glasses: Limited to lower magnification (2x to 5x) and lack advanced lighting systems, making them less effective for detailed skin examination.
2. Dermatoscopes: While dermatoscopes provide higher magnification (10x to 20x) and polarized lighting, they are more expensive and complex to use.
3. Smartphone Cameras: Smartphone cameras with macro lenses can capture detailed images but lack the real-time precision and lighting control of magnifying glasses.
4. Microscopes: Microscopes offer high magnification but are impractical for routine clinical use due to their size and cost.
Dermatologist magnifying glasses strike a balance between portability, affordability, and accuracy, making them ideal for everyday clinical practice.
What Essential Features Should You Look for in a Professional Dermatological Magnifying Glass?
When selecting a professional dermatological magnifying glass, consider these essential features:
1. High Magnification (10x to 20x): Ensures detailed visualization of skin structures and abnormalities.
2. Built-In Lighting: LED lights with adjustable brightness and polarization enhance visibility and reduce glare.
3. Ergonomic Design: Lightweight and comfortable to hold, reducing hand fatigue during prolonged use.
4. Durable Materials: Scratch-resistant lenses and sturdy construction ensure longevity.
5. Portability: Compact and easy to carry, making it suitable for both clinic and field use.
6. Adjustable Focus: Allows for precise focusing on different skin layers and areas.
Investing in a magnifying glass with these features ensures reliable performance and accurate diagnoses.
How to Choose the Right Magnifying Glass for Clinical Practice: A Quality Assessment Guide
Selecting the right magnifying glass for clinical practice requires careful evaluation. Here’s a step-by-step guide:
1. Define Your Needs: Determine the primary use (e.g., skin cancer screening, acne assessment) and required magnification level.
2. Test the Lighting: Ensure the built-in lighting is bright, adjustable, and evenly distributed.
3. Check Lens Quality: Look for high-quality, scratch-resistant lenses that provide clear, distortion-free images.
4. Evaluate Ergonomics: Hold the magnifying glass to assess comfort and stability during use.
5. Compare Brands and Reviews: Research reputable brands and read user reviews to gauge reliability and performance.
6. Consider Budget: Balance cost with features to find a tool that meets your clinical needs without overspending.
By following this guide, you can choose a magnifying glass that enhances your diagnostic capabilities and fits your practice requirements.
What Precautions Should Be Taken When Using Magnifying Glasses for Skin Examination?
Using magnifying glasses for skin examination requires attention to detail and safety. Here are key precautions:
1. Proper Lighting: Ensure adequate lighting to avoid eye strain and improve visibility.
2. Clean the Lens: Regularly clean the lens with a soft cloth to prevent dirt or smudges from obscuring the view.
3. Avoid Excessive Pressure: Do not press the magnifying glass too hard against the skin, as this can distort the image or cause discomfort.
4. Maintain Hygiene: Disinfect the magnifying glass after each use to prevent cross-contamination.
5. Use Correct Magnification: Choose the appropriate magnification level for the condition being examined to avoid misinterpretation.
6. Patient Comfort: Explain the procedure to the patient and ensure they are comfortable during the examination.
How to Follow a Maintenance Guide for Preserving Your Dermatological Magnifying Glass?
Proper maintenance of a dermatological magnifying glass is crucial for its longevity and accurate performance. Regular cleaning is the first step. Step by step, start by using a soft, lint - free cloth. Gently wipe the lens to remove any fingerprints, dust, or debris. Why is lens cleaning important? A dirty lens can distort the image, making it difficult for dermatologists to observe skin details accurately. If there are stubborn smudges, a small amount of isopropyl alcohol on the cloth can be used, but make sure to dry the lens thoroughly afterward to prevent any residue from affecting the optics.
Inspecting for physical damage is also essential. What should you look for? Check the frame for any cracks or loose parts. A damaged frame may cause the magnifying glass to be unstable during use. Examine the hinge, if applicable, to ensure smooth movement. If any issues are detected, the magnifying glass should be repaired or replaced promptly.
Storage is another key aspect. How should you store it? Keep the magnifying glass in a protective case when not in use. This shields it from accidental drops and scratches. Store it in a dry place, away from humidity, as moisture can cause the lens to fog or develop mold over time.
What Are the Differences Between LED and Halogen Illumination in Dermatological Magnifying Glasses?
LED and halogen illumination in dermatological magnifying glasses have distinct characteristics. LED illumination offers several advantages. Why are LEDs popular? They are energy - efficient, consuming less power compared to halogen bulbs. This means longer battery life for portable magnifying glasses. LEDs also have a longer lifespan, reducing the need for frequent bulb replacements. In terms of light quality, LEDs produce a cooler, more consistent light. This is beneficial as it reduces the risk of heat - related discomfort for patients during examinations. The color rendering index (CRI) of high - quality LEDs is also quite good, allowing for accurate visualization of skin colors and details.
Halogen illumination, on the other hand, has its own merits. Halogen bulbs provide a warm, bright light that some dermatologists prefer. How does this warm light affect examination? It can enhance the contrast in certain skin conditions, making it easier to spot subtle changes. However, halogen bulbs consume more power and have a shorter lifespan. They also generate more heat, which may be a concern during extended examinations, both for the patient's comfort and the potential for affecting the magnifying glass components over time.
What Are the Portable Magnifying Tools for Dermatologists in Field Practice?
Portable magnifying tools are essential for dermatologists in field practice. Handheld magnifying glasses with built - in illumination are a popular choice. How do they work? They are lightweight and easy to carry. Many come with LED lights, which are energy - efficient and provide sufficient brightness for examining skin lesions. Some models have adjustable magnification levels, allowing dermatologists to zoom in on specific areas of interest. For example, a dermatologist visiting a rural area can easily carry a handheld magnifying glass in their bag and use it to quickly assess patients' skin conditions.
Pocket - sized magnifying loupes are another option. What makes them convenient? They are compact and can be easily slipped into a pocket. These loupes often offer a fixed magnification, typically around 2x to 5x, which is useful for a quick overview of skin lesions. They are especially handy for dermatologists who need to make on - the - spot assessments during outdoor clinics or home visits.
There are also digital magnifying tools. How do digital tools enhance field practice? These devices not only magnify but can also capture images. This is valuable as dermatologists can record the appearance of skin lesions for further analysis or to share with colleagues. Some digital magnifying tools are connected to smartphones, allowing for easy transfer of images and access to additional diagnostic apps.
How to Combine Digital Photography with Magnifying Glass Examination?
Combining digital photography with magnifying glass examination can enhance dermatological diagnosis. First, select a suitable digital camera or use the camera on a smartphone. Why is the choice of camera important? A camera with good resolution and macro capabilities is ideal. This ensures that the images captured are clear and detailed, allowing for a closer look at skin features.
Next, use the magnifying glass to examine the skin area of interest. While looking through the magnifying glass, position the camera to capture the magnified view. Step by step:
Frame the area carefully, making sure to include all relevant details.
Adjust the focus of the camera to get a sharp image of the magnified skin.
Ensure proper lighting. If the magnifying glass has built - in illumination, use it. Otherwise, find a well - lit area or use an external light source.
Take multiple images from different angles. This provides a more comprehensive view of the skin lesion.
Once the images are captured, they can be analyzed later. Dermatologists can zoom in on the digital images to further examine the details, compare them to previous images for tracking changes over time, or share them with other specialists for a second opinion.
How to Follow a Training Guide for Developing Observational Skills with a Dermatological Magnifying Glass?
Developing observational skills with a dermatological magnifying glass requires a structured approach. First, study the basic principles of magnification. Why is this important? Understanding how magnification works helps dermatologists know what to expect when using the magnifying glass. Learn about the different magnification levels and how they affect the view of the skin.
Practice on normal skin first. Observe the texture, pores, and any small details. Then, move on to examining skin with known benign lesions. In a list format:
Start with common moles. Use the magnifying glass to note the shape, color, and border characteristics.
Examine freckles and observe how the magnifying glass reveals more details about their distribution and color variation.
Look at seborrheic keratoses and identify the characteristic features such as rough texture and the presence of small cysts.
As skills improve, progress to examining more complex or potentially concerning skin lesions. Receive feedback from experienced dermatologists. They can point out important details that may have been missed and provide tips on how to improve observational accuracy. Regular practice with different types of skin conditions and continuous learning will gradually enhance observational skills with the dermatological magnifying glass.
This article explores the essential role of a dermatologist's magnifying glass in diagnosing skin conditions, including skin cancer, melasma, and psoriasis. We discuss the key components of professional dermatological magnifying glasses, such as high-quality lenses, adjustable lighting, and ergonomic design. The guide also provides step-by-step workflows for integrating magnifying glass examination into clinical practice, tips for choosing the right tool, and precautions for accurate and safe use. By leveraging these insights, dermatologists can improve diagnostic accuracy and patient outcomes.